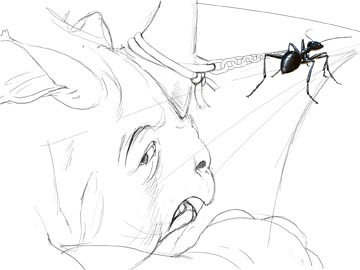
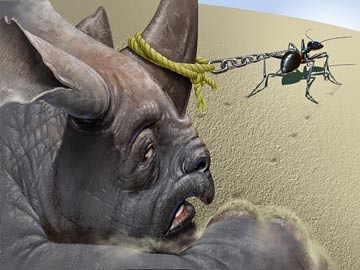
The ant was done several years ago for a company that makes pesticides. It was done in acrylics with airbrush and traditional brushes. I played with the scale and position of the ant until I found a relationship that looked like it would work...I know the ant is much too big in relationship to the rhino, but the ant is the hero, and it needs to be large enough to see, so I took some artistic license with scale. The rhino was drawn using photo reference found online. Of course, there were no photos that were from the correct angle, so this guy is a conglomeration of many. I did this drawing in Photoshop using a Wacom Intuos II 9X12 tablet. The sketch layer was moved to the top of the stack and the blending mode was set to "Multiply" so that it's visible from every layer under it (Multiply makes the dark marks visible, but the white areas [the background] become transparent).
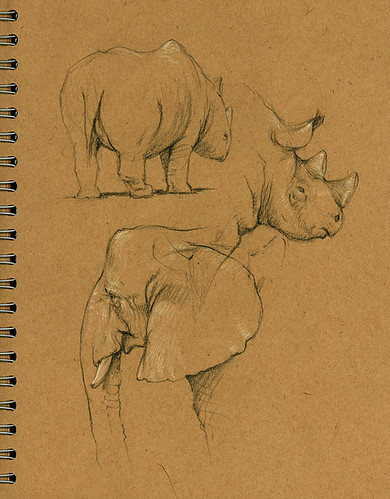
For reference I also used these sketches from a trip to the zoo; they came closer to the angle I was after than any of the photos I could find.
Step 2:
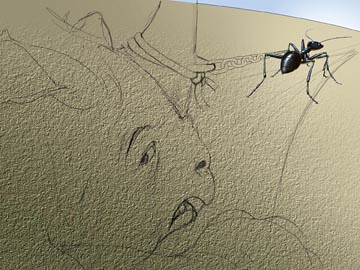
The sandy ground was done on a new layer at the bottom of the stack. I filled the area with a sandy beige color, then I used the linear gradient tool and did a gradient of dark khaki to transparent from bottom left to upper right; the gradient blending mode was set to multiply.
I wanted the texture to be obvious in the foreground but fade as it recedes into the distance, so I pressed "Q" to enter Quick Mask mode, dragged a gradient from upper right to lower left to mask off the upper right area, pressed "Q" again to create a selection of the un-masked area, and ran the texturizer filter using sandstone as the texture.
The sky was done by drawing the shape with the pen tool, changing the path to a selection, filling the selection with a sky blue, then using the radial gradient with a very light blue to give the impression of a sunny day.
Step 3:

The rhino was done in several stages: the head was one layer; I made a tracing of the sketch with the pen tool, changed the resulting path to a selection, filled the selection with a neutral gray, and then used the brush tool and a variety of brush configurations to paint in the textures and details. The foreleg and foot were on another layer, and the surface textures were on yet another layer; I'm a big believer in layers because they offer so much flexibility.
Step 4:

Next come the horns, which were done exactly like the head, but on a new layer.
Step 5:

The ear is next; rhino ears are very strange, and kind of cute; they remind me of a waffle cone that's been rolled up, before the ice cream goes in. I then added a shadow for the ear on a layer below.
Step 6:
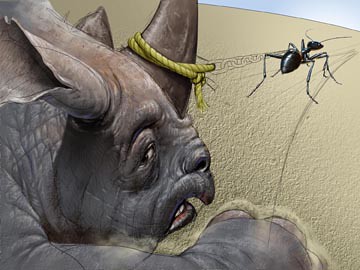
The rope comes next. I thought about drawing the chain going all the way around the horns, but the grays and blues of the chain were too close in color to the rhino's horn and might have gotten lost, so I chose to attach the chain to a rope, instead. The rope was traced with the pen tool, converted to a selection, then filled with a yellowish, "ropey" color. The braids were done with the brush tool and the same yellowish color set to multiply mode.
I also wanted to give the appearance that the feet were being dragged through the sand, so I created a new layer and added "dust" coming up from his feet, and in front of his chin and leg.
Step 7:
The chain comes next. I created a new file and drew two links that were the largest size I would need. After I was happy with the color and the metallic nature of the links, I dragged them to the rhino art. There, I went to Edit>Transform>Distort, and shaped the links to fit the angle and the perspective correctly. Then I hit Command-J to copy the transformed links to a new layer. I then hit Command-T to go into transform mode on the new links and adjusted them to the proper size and position so that they lined up in the correct position, scale and perspective relative to the previous links, and repeating this process until the chain was complete. The ant was copied onto a new layer and was transformed (squished) to a shape that would serve as a shadow for the ant; the shape was moved to it's proper position, then I command-clicked the layer icon to make a selection of the shape, and filled it with a cool gray. I used the blur tool to soften the shadow in appropriate areas.
The ant needed some "footprints" at this point, so I added those as well.
Step 8:

The final step was to copy the completed chain onto a new layer and turn it into a proper shadow for the chain to cast onto the ground; I used the same procedure as I used for the ant shadow above. The ant shadow and the chain shadow were placed on the same layer, and the blending mode was changed to multiply and the opacity was reduced a bit to allow the texture of the ground to show through. And that's that.
4 comments:
thank u very much for comment!
thanks for the step-by-step about the ant, i liked this drawing alot!
i´d like to do that kind of art ,too. maybe some day, we never now.
take care and kisses.
I like the idea behind this. Nice work. Thank you for the step by step. Sometimes I just run out of patience with my rendering and get too heavy handed with the colouring in! You remind me to take care ad go slowly!
Thank you for sharing with us how you create this piece of illo. At first I thought it was handpainted. It's superbly well created. Likewise your other illos.
Excellent.Very thorough explanation---Great result----Impressive....I've been using photoshop as for atleast a decade now (since I began my career as a designer), and there's still always plenty of new impressive tricks to discover from others. I really appreciate people who take the time to share their techniques. Good job!
P.S. I especially enjoy the fact that you showed your early "research" sketches---that's a part people tend to forget about.
Post a Comment