A little background; Merry Down is a hard cider beverage from England. Their advertising imagery always involves images that can be viewed right-side-up, or upside-down. Typically, the right-side version shows a happy drinker with a full glass of Merry Down. The upside-down version shows a sad drinker with an empty glass. I've used this idea as an assignment for some of my techniques classes because it involves clever and fun imagery, and necessitates thinking ahead several steps to make everything come out right.
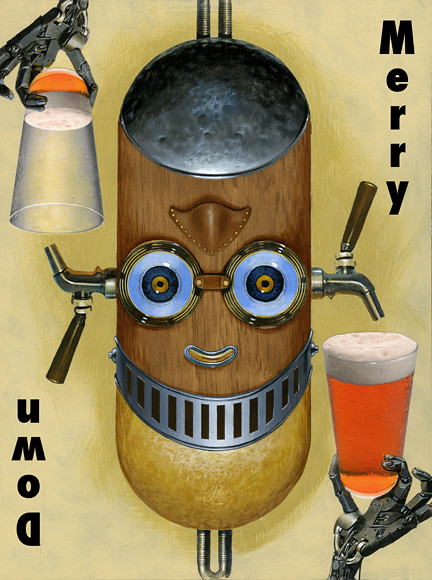
This is the final, after the type was added. I am going to take you through the major steps of this process...
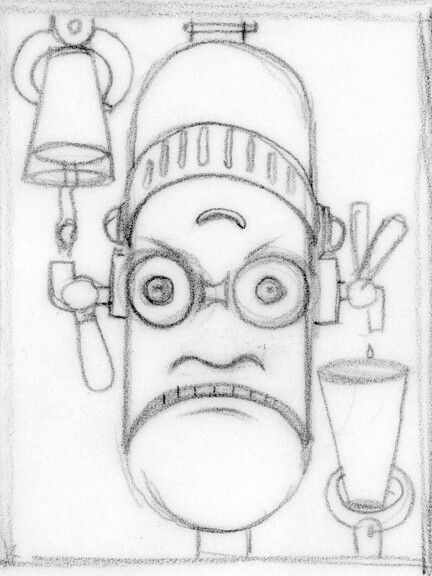
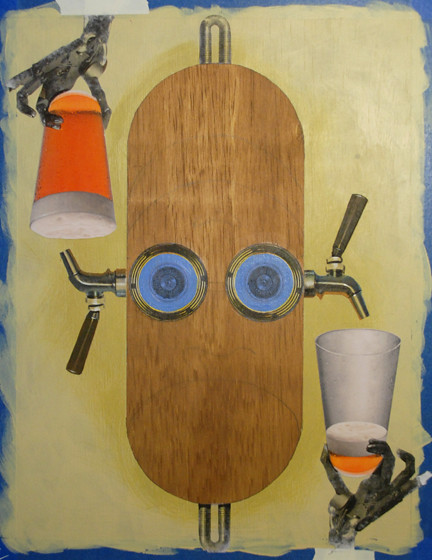
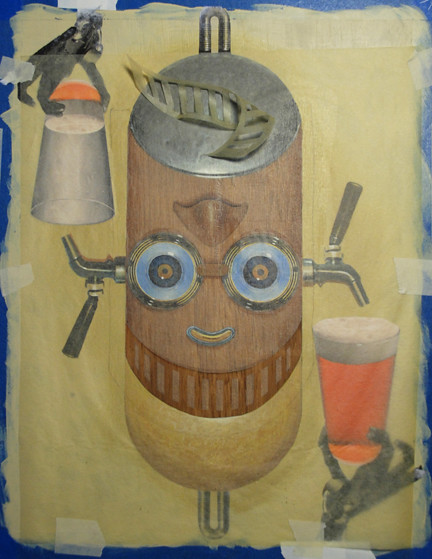
This is the thumbnail I used as a rough guide for the piece. I wanted to keep it a bit unfinished which would allow for a bit of flexibility in the development of the image.
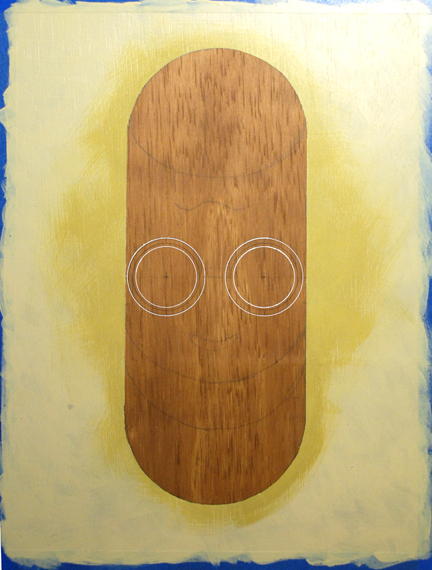
The substrate is a 12 X 16" piece of Luan; birch plywood about 1/4" thick. I "stained" the surface with acrylics and water, using burnt umber and burnt sienna to get a warm walnut color. After lightly sanding the surface, I painted on two coats of Liquitex Matte Medium thinned with a little water. I then transferred the sketch using an Artograph opaque projector. I used a compass to draw perfect curves, by the way.
After the drawing was transferred, I used Scotch soft release painter's tape to tape off the margins, and to roughly mask off the center capsule shape that would be the robot's head; I used the tape to carefully define the sides of the shape, but needed to leave the curved areas at the top and bottom visible, so I cut the tape short in order to see the lines. I used liquid masking fluid to mask off the curved areas, and carefully painted in the fluid up to the edge of the compass curves.
Once everything was masked off, I used acrylic paint to paint in the warm cream tone for the background. It seemed too stark and even, so I mixed a slightly darker ocher and scumbled it in around the edge of the masked area and where the beer taps would go.
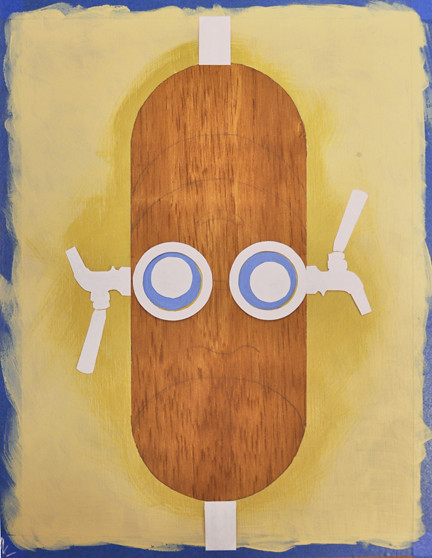
I removed the masking fluid and tape, and then used a ruler to find the center-line of the "face". I drew a light line at that point, and used a compass set to the same radius as the goggles inside and outside diameters, and using a drafting pen with fluid acrylic paint, drew the perfect circles where the goggle transfers would go.
I painted the rims of the goggles with a yellowish tone that would resemble brass when finished, and a sky blue for the eyes. You have to remember that this acrylic transfer technique leaves only the toner of the laser print behind, so any area that appears white on the print will become transparent in the transfer; the underpainting determines the color of the lighter values of the transfer. I added a bit of tonal modulation in the brass rings, but that may not be necessary... I get a bit obsessive about these things.
I scanned a book of engravings to get some of the elements in this piece, and I did some internet image searching to get the rest; the beer glasses, the beer taps and the robot hands were found online. The rings of the goggles were a scan of the bottom of a can of mixed nuts...anything is fair game!
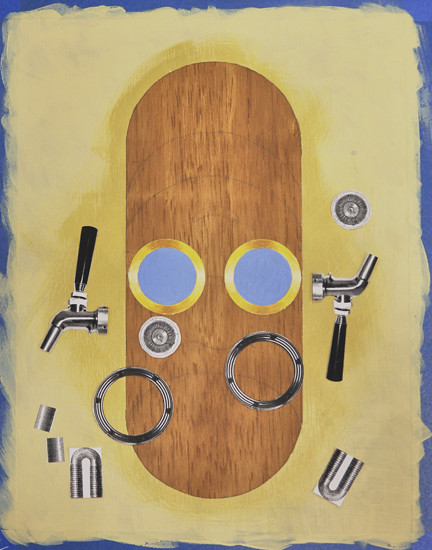
The elements here were printed on a monochrome laser printer on plain bond paper and cut out with an X-Acto knife. I laid them out toner-side up to get a sense of how the sizes were going to work.
This shows the elements roughly "dry-fitted" before being glued down permanently.
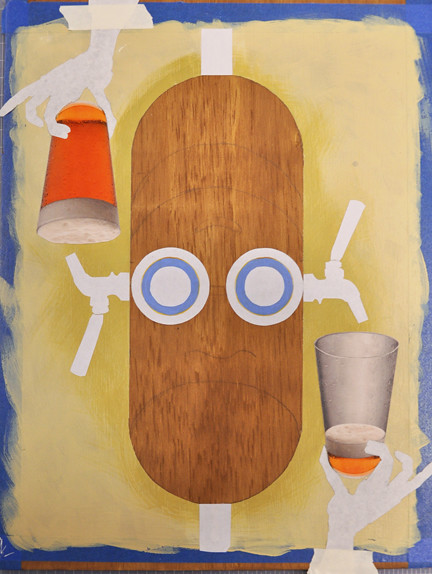
I did some Photoshop work on the beer glasses to make one look almost empty. These would be simply printed with an inkjet printer, cut out and glued on the artwork using matte medium.
I then painted a generous amount of matte medium on the panel where the black and white transfer elements were to go and also painted medium on the toner side of the cut-out prints to ensure good adhesion. The pieces were placed face-down on the artwork and were carefully burnished down using a bone folder, trying to avoid getting any medium on the back of the prints which would make the pulp removal process much more difficult. Notice I taped down the robot hand prints to make sure they would be perfectly positioned with the glass when the transfers were done.
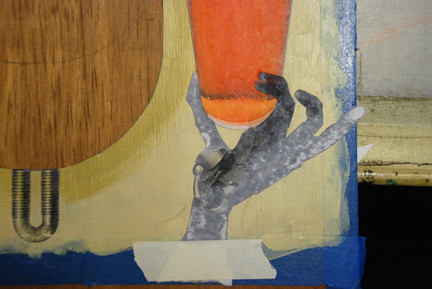
This shows the robot hands after the medium has dried and the transfer process has begun; after several hours of drying time (preferably overnight), the back of the prints are wet with clean water. Dip your fingers into the water and begin to gently rub the back of the prints. The paper pulp will begin to pill up and rub off. Continue wetting and rubbing the prints until the paper pulp has been rubbed away. It's almost impossible to get every last remnant of the paper pulp off, but if you are patient and persistent, you can get 90% of the pulp off and retain all of the detail in your transferred print. You will see that if you rub too hard, you run the risk of ruining your transfer. If you stop too soon, you will end up with a cloudy image that has too much pulp remaining.
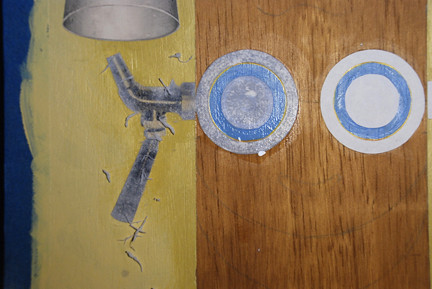
You can see the pulp that has pilled up with continued rubbing, and you can clearly see the difference in the tap, which has been rubbed for several minutes, and the goggles which have only been wet at this point.
The rubbing is complete; all of the elements have been transferred using the acrylic medium technique. Some areas were a bit cloudy because I was worried that I might begin to rub off the transferred toner, so I stopped a bit too soon. To counteract that a bit, you can paint a coat of matte medium and water on the transfers and they get a bit less cloudy.
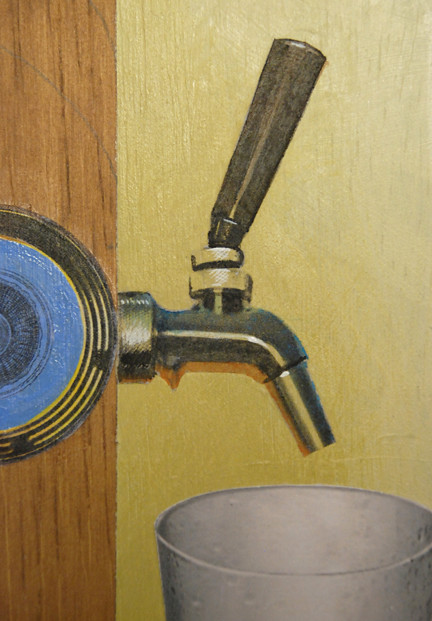
At this point, the transfers are done and the painting can begin. You'll notice that in the lighter chrome areas of the beer tap, the ochre background color shows through. In some areas that's great, because the colors all integrate with the background. But it needs some cooler colors and some highlights to look like metal, so I'm painting in some blues on top, some oranges underneath to reflect the color of the beer, and some white highlights to add some sparkle. Notice I'm trying to angle the highlight brush strokes to mimic the knerling on the fixtures. Nothing is perfect here, but why should it be? This is a painting, and the imperfections add to the character of the piece.
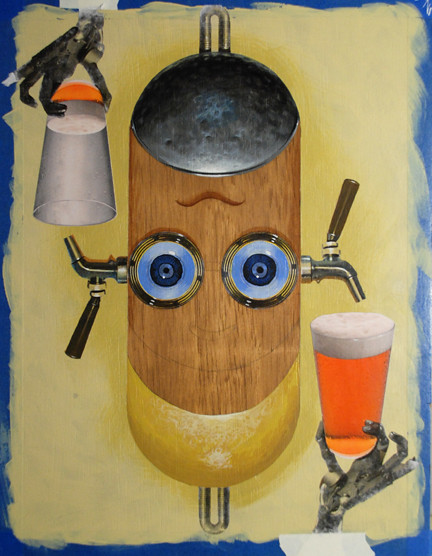
So now I'm painting the top and bottom of this robot's metal head; iron on the "down" side and brass on the "Merry" side. I painted a flat tone to begin with, and then slowly built up darks and lights to give it a hand-hammered look, with lots of imperfections. The brushwork is very loose and impressionistic. I've also painted the eyes a combination of dark blue and light blue, with black pupils and several catch lights. Note that the catch lights, or sparkles in and around the eyes line up on a consistent bias; this implies a single, specific light source and makes it look more realistic.
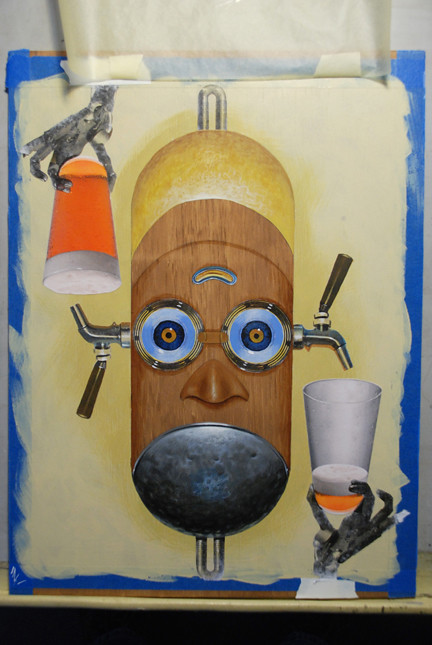
The two noses go on next; I wanted one to be metal and the other to me more retro, so I went with a leather look. The eyes seemed uninteresting, so I added an orange ring around the pupils.
Now it's time for the "grin". I saw this as a hinged, slotted metal piece, reminiscent of a knight's jousting helmet. Rather than try to laboriously hand paint around the the precise rectangles and the gentle gradation from light in the center to darker at the sides, I decided to make a frisket (mask) out of canary tracing paper and rubber cement. I covered most of the artwork with the tracing paper to which several coats of rubber cement had been applied, and cut out the part to be painted with an X-Acto knife. I removed the frisket and, using a 1" flat brush, quickly painted in the metal grin with shades of blue-gray. I carefully replaced that the frisket that had been removed, and then removed the rectangles that make up the slots, or "teeth" of the grin. I used thinned black acrylic ink and a 1/2" flat brush to darken those slots.
After the frisket was removed, I painted in the highlights on the slots, and added a rolled edge to the top and bottom of the metal grin. I also painted in some bolts on the side so the piece can swing up and down. The last step was to paint in the details of the robot hands which were not very clear in the transfers.
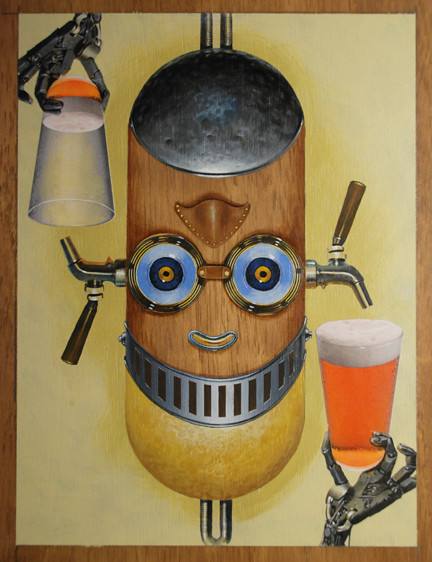
Here is the finished piece with type; this is the happy "Merry" view...
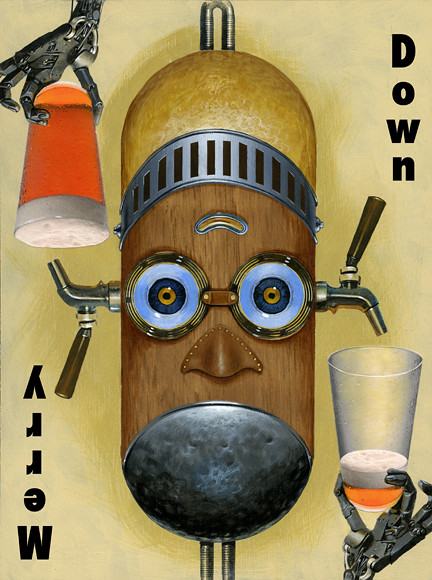
And here is the unhappy "Down" view.
Cheers!