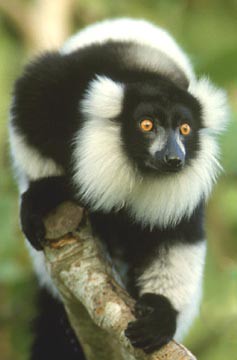
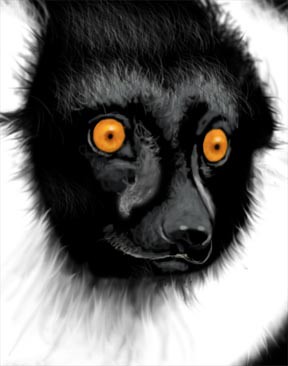
This is the reference photo I used; it was published online, and I hope it is a public domain image; there was no copyright notice on the image, so I hope it's ok to use ; ).
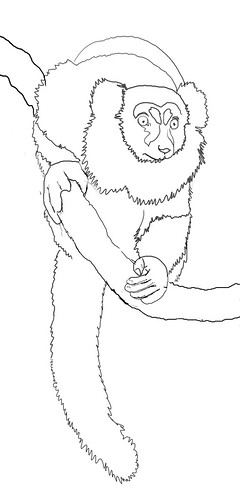
I added some area to the bottom of the canvas to accomodate the long tail, and sketched in the basic shapes using a Wacom tablet; I use a small, 3 or 4 pixel soft brush to draw with in Photoshop. If you want it to look like graphite, you can add texture and a little noise in the brushes palette.
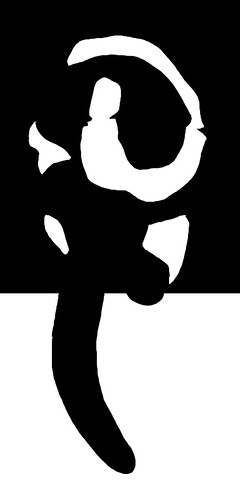
Next, I added a layer at the bottom of the stack and filled the top area with black and the bottom with white. Then, I made a new layer above that one for the basic shapes; I used the lasso tool and roughly drew shapes for the black and white areas and filled the selections with the appropriate color. I wanted a stark black and white abstract pattern at this point, so I made the selections as simple as possible while still maintaining the essence of the lemur.
Now comes the fun part. I used a small brush and the Wacom tablet and painted with white to create fur along the edges of the shapes I had defined earlier. For smaller, more random fur, I used the brush that is normally used for creating blades of grass, and after tweaking the settings in the brushes palette, I came up with a reasonable simulation of fur. I also used the smudge tool a bit to soften some of the fur.
For the face and hands, I used various shades of gray to bring out the details, painting with small, soft brushes; I lower the opacity and flow settings to get as much control as possible. Still, I was not too concerned with precise details, as you can see below...
The details of the face are quite impressionistic and loose; I just wanted to get enough detail to capture the expression on the lemur's face.
The eyes were done on a seperate layer; I used the lasso tool to create selections for the eyes and filled them with an orange that was a touch more saturated than the photo. I added pupils and a catchlight using a small brush and the Wacom tablet.
You can see in this close-up where the smudge tool comes in handy for softening the fur, especially under his chin.
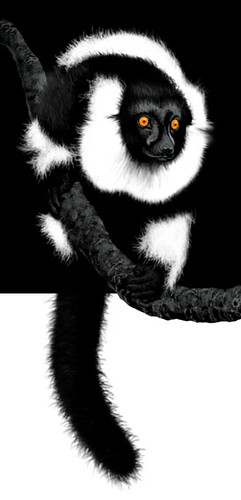
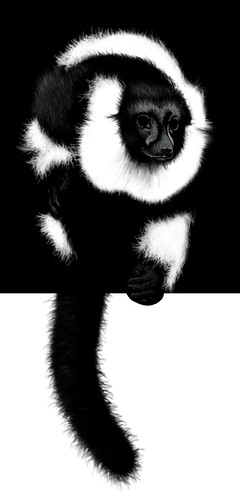
And, again, here is the finished piece. The details in the hands got lost in all the darkness, but that's okay...it adds to the mystery that I was shooting for.
8 comments:
one word.......... WOW.
That's awesome! Thanks for sharing the process.
Great - thanks for sharing!
Your work is wonderful. I'm amazed that this was all done digitally. I usually create a large version of my illustrations on the off chance that it needs to be print resolution, I'd be interested to know whether you do that as well. I was very flattered that you liked my IF entry, thanks.
Thanks for the comments!
Julie, yes, I typically work at 300dpi at the physical size that it will print. I usually work in the RGB colorspace and convert to CMYK if it will be press printed. Some clients prefer an RGB file anyway (RGB is said to contain more color data than CMYK?), and do the conversion to CMYK at their end.
As for all digital, I use lots of different approaches to making illustrations; sometimes it's all traditional, sometimes its all digital, and sometimes I'll do a piece traditionally, scan it, and finish it digitally. It all depends upon the image and the amount of time I have.
Thanks so much for your comments on the creation process! The way the eyes pop out is incredibly hypnotic!
Excellent tutorial - I'm not a Photoshop user, preferring to use traditional mediums (call me stubborn), but I can see how I can I use some these techniques in my own drawings. Again, many thanks.
Detlef
http://www.detlefjumpertz.com
I felt like i'm in a class and I got the front seat! Lucky knottydon! Anyhoo, more tips from a genius!!!
Post a Comment